
BMW 7 Series: Stripping Operations - Replacing Rear Left Side Panel
NOTE: Owing to the different engine variants and equipment specifications, not all the components are taken into consideration.
The following list basically represents the removal sequence.
- Clamp off battery negative lead (job number: 6120 900)
- Remove bumper trim (job number: 5112156)
- Remove bumper support (job number: 5112050)
- Remove center bumper guide (job number: 5112825)
- Remove left bumper guide (job number: 5112828)
- Remove luggage compartment floor trim panel (FR number: 5147101)
- Remove tail panel trim at top (FR number: 5146050)
- Remove left luggage compartment wheel arch panel (FR number: 5147151)
- Partially detach rear lid seal
- Remove left rear lid (FR number: 6321180)
- Remove trim panel for left roof pillar (FR number: 5143 251)
- Remove rear lid (FR number: 41 62 000)
- Remove left lock striker (FR number: 5121003)
- Remove rear left door sill cover strip (FR number: 51 47 030)
- Remove rear left rocker panel trim (FR number: 51 47 072)
- Remove left backrest side section (FR number: 52 26 008)
- Remove trim on C-pillar at bottom left (FR number: 51 43 230)
- Remove rear left door mucket (FR number: 5172010)
- Remove rear window (FR number: 51 31 200)
- Remove rear left wheel arch cover (FR number: 51 71 041)
- Remove panel for cover on left side member (FR number: 5171447)
- Remove rear left door
- Remove trim strip on left roof frame (FR number: 5113280)
- Remove holder for gas pressure spring on left
- Partially release wiring harness
STRIPPING-DOWN OPERATIONS - REPLACING COMPLETE TAIL PANEL
NOTE: Owing to the different engine variants and equipment specifications, not all the components are taken into consideration.
The following list basically represents the removal sequence.
- Remove bumper trim (FR flat rate number: 5112156)
- Remove bumper carrier (FR number: 5112050)
- Remove center guide (FR number: 5112825)
- Remove guide for bumper on left and right (FR number: 5112828)
- Remove luggage compartment floor trim panel (FR number: 5147101)
- Remove luggage compartment storage compartment (FR number: 5147...)
- Upper tail panel trim (FR number: 5146050)
- Remove left luggage compartment wheel arch panel (FR number: 5147151)
- Remove right luggage compartment wheel arch panel (FR number: 5147161)
- Remove striker for rear lid (FR number: 5124130)
- Remove rear lights (FR number: 6321180)
- Partially detach rear lid seal
NOTE: Operation is described on the left side. Right side identical.
Lift out clip (1) and remove drip molding trim (2).
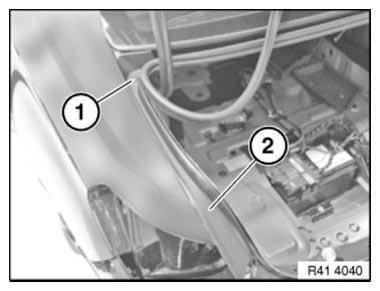
Fig. 352: Identifying Clip And Drip Molding Trim
NOTE: Operation is described on the left side. Right side identical.
Lever out expander rivets (1) and fold sound insulation (2) to one side.
Release nuts and remove ground/earth points (3).
Tightening torque 41 34 2AZ.
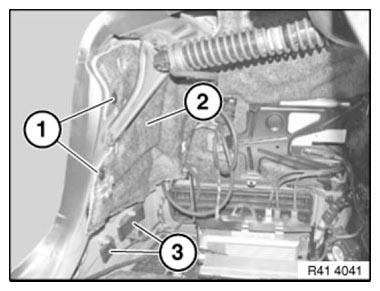
Fig. 353: Identifying Expander Rivets, Ground/Earth Points And Sound
Insulation
Release cable duct covers (1) and lay towards front.
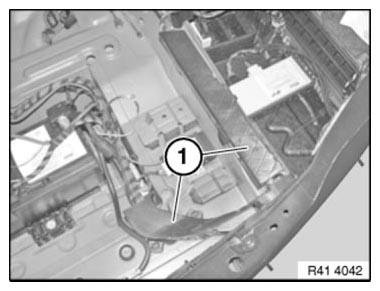
Fig. 354: Identifying Cable Duct Covers
Release wiring harnesses (1) from rear trim panel and lay towards front.
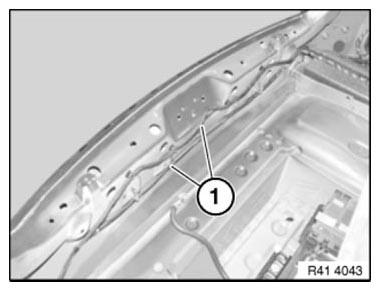
Fig. 355: Identifying Wiring Harnesses
View from below.
Release nuts (1) and remove cover (1).
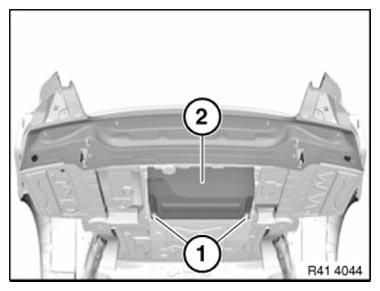
Fig. 356: Identifying Nuts And Cover
READ NEXT:
 Cover For Side Member At Rear (Rear Side Panel Removed)
Read contents of BODY, GENERAL.
Use only approved SPOT-WELDING APPARATUS for repairs.
The following new bodywork parts are required:
Cover, side member, rear (component is included on new side pan
Reinforcement Plate With Stud Bolt (Bonded)
In the case of a partial replacement piece, a body component is cut at a
point described in the repair instructions.
A reinforcement plate is bonded in to ensure sufficient strength.
Reinforcement
SEE MORE:
Steering Wheel
Removing And Installing/Replacing Sport Steering Wheel
NOTE: Chassis/wheel alignment is not necessary after the steering wheel
has been
removed and installed or replaced.
Necessary preliminary work
Remove AIRBAG UNIT
Move wheels/sport steering wheel into straight-ahead position.
Disconnect plug
Indicator/warning lights- Blue lights
High beams
High beams are switched on.
Additional information:
High beams
Gray lights
Active Cruise Control with Stop &
Go function
Indicator light is illuminated:
the system
is interrupted.
Indicator light flashes: the conditions are
not adequate for the system to work or the system
has been
