BMW 7 Series: Removing Hydraulic Chain Tensioner For Timing Chains On Left Side (N63)
Notes
WARNING: Chain tensioner is pre-tensioned.
Release lock pin only in installed state.
Danger of injury!
IMPORTANT: Risk of damage! The engine must not be cranked when the chain tensioner is removed.
The timing chain may jump.
Necessary preliminary work
- Remove TIMING CASE COVER at top left
Crank engine back at central bolt (1) against direction of engine rotation by approx. 90º.
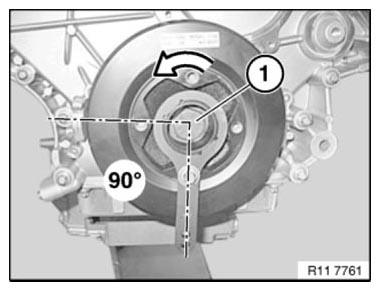
Fig. 268: Cranking Engine Back At Central Bolt Against Direction Of Engine
Rotation By Approx. 90º
IMPORTANT: The timing chain on the chain tensioner becomes the tight end on cranking back.
Do not crank engine without chain tensioner or special tool 11 9 900.
Piston (1) of chain tensioner must be pressed in against oil pressure in housing (see arrow).
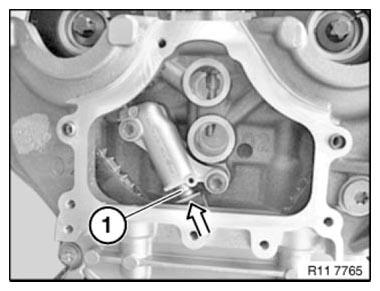
Fig. 269: Identifying Piston Of Chain Tensioner Pressed In Against Oil
Pressure In Housing
If the chain tensioner piston is retracted over its full length, a 3.5 mm drill bit or a suitable lock pin must be positioned.
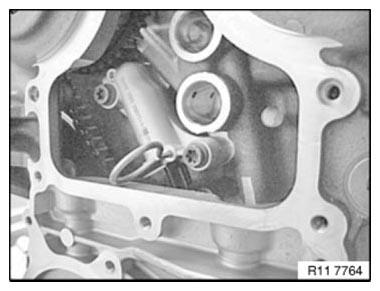
Fig. 270: Identifying Chain Tensioner Piston Retracted Over Its Full Length
Release screws (1).
Tightening torque 11 31 5AZ.
Remove chain tensioner (2).
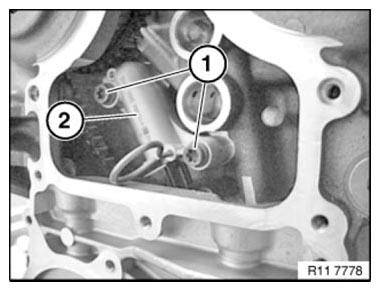
Fig. 271: Identifying Chain Tensioner And Screws
IMPORTANT: Danger of injury! Chain tensioner is under high preload force.
Chain tensioner arrangement:
- Piston
- Expansion element
- Compression spring
- Housing
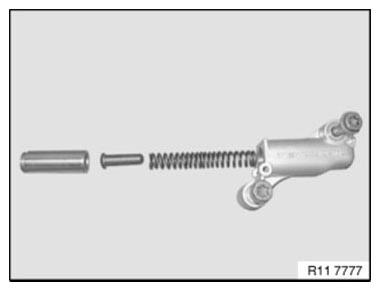
Fig. 272: Identifying Chain Tensioner Arrangement
Installation note:
Replace all gaskets and sealing rings
Assemble engine.
READ NEXT:
 Removing Hydraulic Chain Tensioner For Timing Chains On Right Side
(N63)
Removing Hydraulic Chain Tensioner For Timing Chains On Right Side
(N63)
Notes
WARNING: Chain tensioner is pre-tensioned.
Release lock pin only in installed state.
Danger of injury!
IMPORTANT: Risk of damage!
The engine must not be cranked when the chain tensioner is rem
Replacing Both Timing Chains (N63)
Notes
WARNING: Burning hazard! Wear gloves.
Necessary preliminary work
Remove lower TIMING CASE COVER
To facilitate removal and installation of timing chains, turn engine
over with special tool 0
Rocker Arm With Bearing Mount
REMOVING AND INSTALLING/RENEWING ROCKER ARMS ON RIGHT SIDE (N63)
Necessary preliminary work
(cylinder bank 1 to 4)
Remove INLET AND EXHAUST ADJUSTMENT UNIT on right side.
Remove right INLET CAMSHAF
SEE MORE:
Ignition Wires, Spark Plugs
REPLACING ALL SPARK PLUGS (N54, N63, N74)
Necessary preliminary tasks
Switch off ignition.
Remove IGNITION COILS.
IMPORTANT: Wear safety goggles.
Oil and dirt particles may get into your eyes!
Clean spark plug slot with compressed air.
Unscrew spark plugs with special tool 12 1 220 and extensi
Removing And Installing Left Cylinder Head (N63)
Necessary preliminary work
Check TIMING
Remove left INLET AND EXHAUST ADJUSTMENT UNIT
Release screw (1).
NOTE: Guide rail is loose from cylinder head.
Fig. 51: Identifying Screw Of Guide Rail
Release bolts (1) at front from cylinder head.
Fig. 52: Identifying Bolt On Front Cylinder Head
Releas
