BMW 7 Series (G11/G12) 2015-2022 Owners Manual / Quick reference / Set-up and use / Seats, mirrors, and steering
wheel
BMW 7 Series: Seats, mirrors, and steering wheel
Electrically adjustable seats
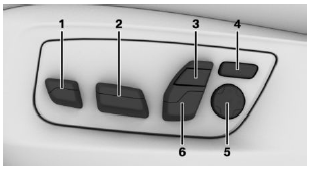
- Thigh support
- Forward/backward, height, seat tilt
- Upper backrest
- Backrest width
- Lumbar support
- Backrest tilt, head restraint
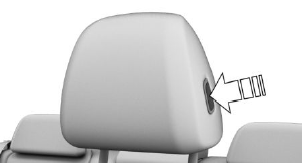
Adjusting the head restraint
Height
Push switch up or down.
Adjust distance: manual head restraints
- Back: press the button and push the head restraint toward the rear.
- Forward: pull the head restraint toward the front.
Adjusting the distance: power head restraints
The head restraint is automatically repositioned when the upper backrest is adjusted.
Side extensions
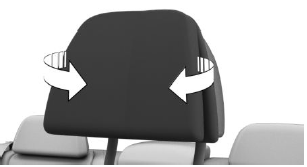
Fold the side extensions forward to increase lateral support.
Adjusting the exterior mirrors
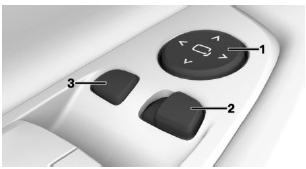
- Adjusting
- Selecting a mirror, Automatic Curb Monitor
- Folding in and out
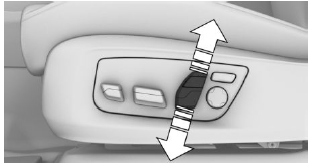
Adjusting the steering wheel
Electrical steering wheel adjustment
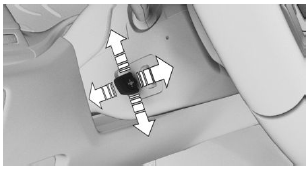
Press the switch to adjust the forward/back position and height of the steering wheel to the seat position.
Memory function
Concept
The following settings can be stored and, if necessary, retrieved using the memory function:
- Seat position.
- Exterior mirror position.
- Steering wheel position.
- Height of the Head-up Display.
Storing
- Set the desired position.
-
 Press button on the
door. The writing on the button lights up. - Press the desired button 1 or 2 at the door while the writing is lit. A signal sounds.
Calling up settings
Press the desired button 1 or 2.
READ NEXT:
 Infotainment
Radio
Changing the entertainment source
CD/DVD drive
Eject CD/DVD
Changing the station/track
Programmable memory buttons
Sound output on/off, volume
Waveband/satellite radio
Navigation desti
Infotainment- Using the phone
Accepting a call
Depending on the equipment, incoming calls can
be answered in several ways.
Via iDrive:
"Accept"
Press the corresponding button on the steering
wheel.
Via the selection list
SEE MORE:
Automatic climate control- Air conditioning
Concept
The air in the car's interior will be cooled and dehumidified
and, depending on the temperature
setting, warmed again.
The car's interior can only be cooled with the
drive-ready state switched on.
Switching on/off
Press the button.
The LED is illuminated with air conditioning
switched on.
Active Cruise Control with Stop & Go function ACC- Displays in the Head-up Display
Desired speed
Some system information can also be displayed
in the Head-up Display.
The symbol is displayed when the
set
desired speed is reached.
Distance information
The symbol is displayed when the
distance
from the vehicle traveling ahead is
too short.
The distance information is active in th
© 2019-2026 Copyright www.bmw7g11.com
