
BMW 7 Series: Pedestrian Protection
REMOVING AND INSTALLING (REPLACING) LEFT PEDESTRIAN PROTECTION SENSOR
WARNING: Observe SAFETY INSTRUCTIONS for handling gas generators.
Incorrect handling can activate pedestrian protection and cause injury.
Necessary preliminary work
- Disconnect BATTERY CABLE
- Remove ORNAMENTAL GRILLE IN BUMPER TRIM.
Release screws (1).
Tightening torque 65 76 1AZ.
Feed out sensor (2).
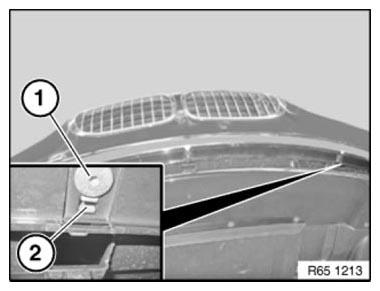
Fig. 95: Identifying Screws And Sensor
Unfasten plug connection (1) and disconnect.
Remove sensor (2).
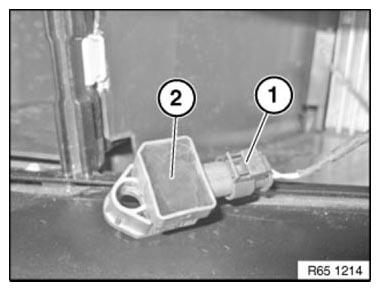
Fig. 96: Identifying Plug Connection And Sensor
REMOVING AND INSTALLING/REPLACING MIDDLE PEDESTRIAN PROTECTION SENSOR
WARNING: Observe SAFETY INSTRUCTIONS for handling gas generators.
Incorrect handling can activate pedestrian protection and cause injury.
Necessary preliminary work
- Disconnect BATTERY CABLE
- Remove BASEPLATE FOR NUMBER PLATE
- Remove ORNAMENTAL GRILLE IN BUMPER TRIM.
Release screws (1).
Tightening torque 65 76 1AZ.
Feed out sensor (2).
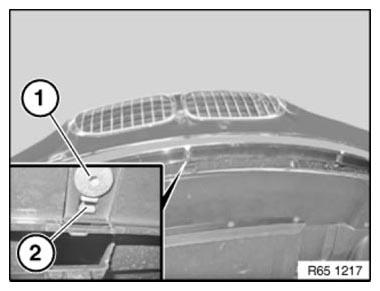
Fig. 97: Identifying Screws And Sensor
Unfasten plug connection (1) and disconnect.
Remove sensor (2).
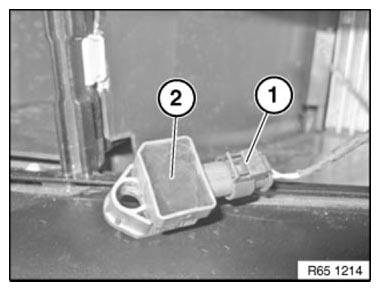
Fig. 98: Identifying Plug Connection And Sensor
REMOVING AND INSTALLING/REPLACING RIGHT PEDESTRIAN PROTECTION SENSOR
WARNING: Observe SAFETY INSTRUCTIONS for handling gas generators.
Necessary preliminary work
- Disconnect BATTERY CABLE
- Remove ORNAMENTAL GRILLE IN BUMPER TRIM.
Release screws (1).
Tightening torque 65 76 1AZ.
Feed out sensor (2).
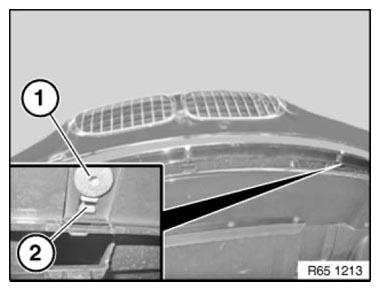
Fig. 99: Identifying Screws And Sensor
Unfasten plug connection (1) and disconnect.
Remove sensor (2).
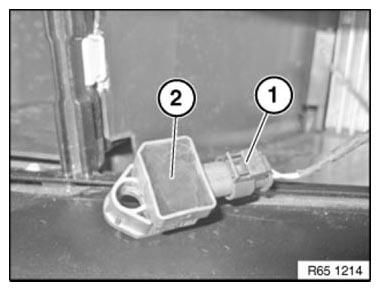
Fig. 100: Identifying Plug Connection And Sensor
READ NEXT:
 Overview Of Aerial Diversity
Fig. 101: Overview Of Aerial Diversity
Aerial amplifier
Blocking circuit
AM choke (US vehicles only)
Back - up aerial
Interference suppression filter
OVERVIEW OF SENSORS FOR AIRBAG SYSTEM AND
Removing And Installing/Replacing Airbag Control Unit
IMPORTANT: Read and comply with NOTES on protection against electrostatic
damage (ESD
protection)!
WARNING: NOTE AIRBAG SAFETY INSTRUCTIONS!
Incorrect handling can activate airbag and cause injury.
N
SEE MORE:
Starter With Mounting
REMOVING AND INSTALLING/REPLACING STARTER (N63)
Necessary preliminary work
Switch off ignition.
Disconnect BATTERY EARTH LEAD.
Remove right ENGINE SUPPORT ARM.
Release connector (1) and remove.
Slacken nut (2).
Tightening torque 12 42 2AZ.
Detach starter positive cable.
Fig. 60: Identifying
Drive, Seat Adjustment
REMOVING AND INSTALLING/REPLACING LUMBAR SUPPORT DRIVE MECHANISM
ON FRONT SEAT, LEFT OR RIGHT
Necessary preliminary tasks
Remove rear panel on front seat backrest.
Unfasten plug connection (1) and disconnect.
Release clips (2).
Feed out drive unit for lumbar support in upward direction.
Instal
