
BMW 7 Series: Replacing Engine Support/Front Left Side Frame Connection (Front Left Wheel Arch Removed)
Observe procedure for REPAIR STAGE 3.
Read contents of BODY, GENERAL.
To remove engine support side frame connection
Following new body parts are required:
- Connection, wheel arch/entrance
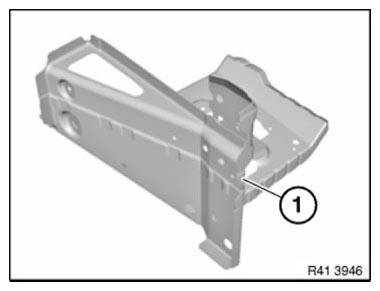
Fig. 218: Identifying Connection, Wheel Arch/Entrance
Open welded connections in areas (1).
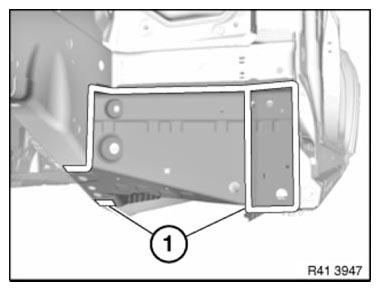
Fig. 219: Identifying Welded Connections Areas
View from below: Open welded connections in areas (1).
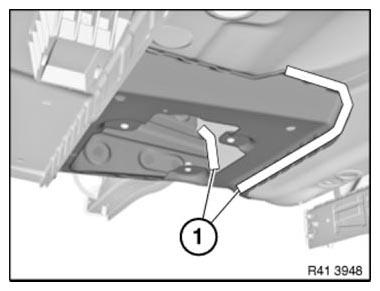
Fig. 220: Identifying Welded Connections Areas
View from below: Open welded connections in areas (1).
Remove wheel arch/entrance connection.
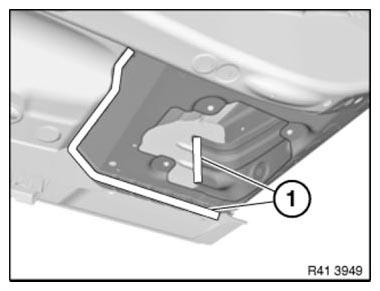
Fig. 221: Identifying Welded Connections Areas
New part preparation
Open welded connections in area (1).
Remove metal section (2).
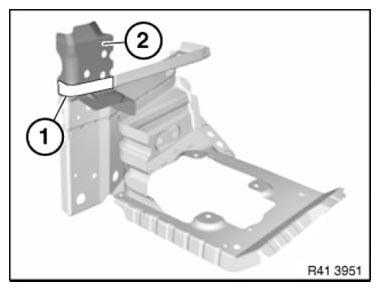
Fig. 222: Identifying Welded Connections Area And Metal Section
To install engine support side frame connection
Install and weld new parts.
READ NEXT:
 Replacing Front Left Wheel Arch
Note the special vehicle identification number procedure when replacing the
front right wheel arch (order the
new body part with the vehicle identification number, if necessary)!
These instructions a
Replacing Outer Section Of Left Or Right Rear Wheel Housing (Side
Panel Removed)
Read contents of BODY, GENERAL.
Spot-weld bonding is used on this vehicle. Observe specific procedure.
Remove or cover those vehicle components in the repair area which are
susceptible to heat or d
Replacing Rear Left Outer Wheel Arch Section (Rear Side Panel
Removed)
Read contents of BODY, GENERAL.
Remove or cover those vehicle components in the repair area which are
susceptible to heat or dust.
Use only approved SPOT-WELDING APPARATUS for repairs.
Following n
SEE MORE:
System Components
Involved Components
The following components are involved in the wiper/washer system:
Control units
Steering column switch cluster
Central gateway module
Junction box electronics
Instrument cluster
Dynamic stability control
Rain/lights/solar/condensation sensor
Wiper switch on the
Display And Control Elements
Fig. 94: Display Function Illumination And Active Blind Spot Detection Button
DRIVER ASSISTANCE SYSTEM REFERENCE CHART
Function illumination
Active Blind Spot Detection button
LIN-bus Connections
Fig. 95: LIN Bus Connections At Footwell Module
LIN BUS CONNECTIONS REFERENCE CHART
ASP_FA - Drive
